Blog Archives
Planning Simple Projects with Trello or Microsoft Planner
At some point in your working life you will be involved in a project of some sort. The type and size of project will vary wildly from a list of “to-dos” through to multi-site, multi-year projects.
Managing these different projects requires different skills and also different ways of keeping track of things. There are lots of tools available out there. The problem is deciding which one to use.
If you are involved in the likes of managing the building of the Olympic stadia, or a new rail line/network, the likes of Primavera might be best suited, allowing you to build multi-site, multi-project programs. Working on single, long term projects with a requirement to track resources and costs, then something like Microsoft Project or similar might be your best option.
For many of us though, both of these would be a serious case of over-kill. The cost of licences etc. is also prohibitive which in turn means that only a very limited number of people are likely to have access to the information.
So, what is available to you for quick simple projects?
This is where software like Trello, Microsoft Planner or Asana might be the tools for you. They are all very similar in their functionality and for two of them come in either free or paying version. I’m going to look at Trello and Planner.
Trello
This is an online tool. There is a free version and a chargeable version with added functionality beyond the standard free one. You’ll need to create an account and then log in to your account to view the planning boards.
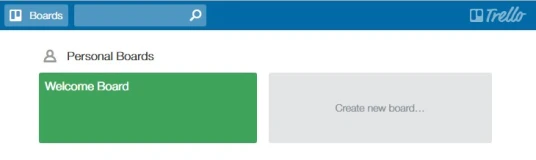
Click on Welcome Board and this opens a useful hints and tips page to give you an overview of everything that can be done within the application.
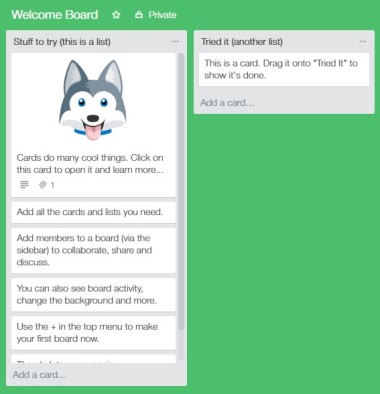
The left hand column has a number of cards with hints and actions to perform to help you discover the basics of Trello.
To create a new project, click on CREATE NEW BOARD. This will start what Trello calls a board. Think of this as a notice board where you can pin job cards. Create new cards by clicking on ADD A NEW CARD. Give your task or activity a name and click the ADD button.

Each card that you create can then be edited to add more detail around the job or activity that needs to be completed. To view the details card, click on the job card.
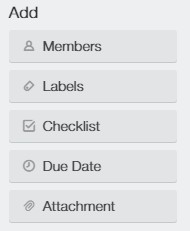
Here, you can add a lot of detail about the task;
- Members – who will complete this task?
- Labels – highlight the task with colour coded labels
- Checklist – add a task specific to do list
- Due date – when does this need to be completed by?
- Attachment – add any relevant files/images etc.
Using the buttons on the right hand side add as much detail as required.
Members: you can invite people to be part of your project team, and once they are on board, you can assign tasks to them. Each task can have multiple people assigned to it.
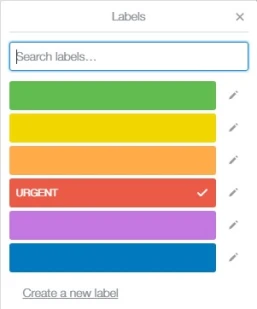
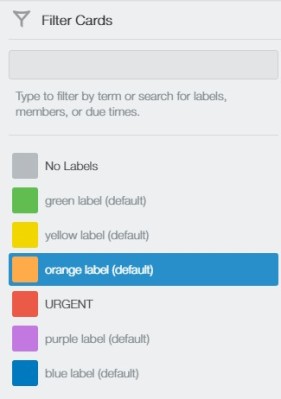
Labels: These are coloured tags that can be assigned to the card. Each tag can be customised with text. There is an option to use colours suitable for colour blind people.
Checklist: add lists of actions that might be required to complete the task. These could just be a list to remind you, or a breakdown of everything that needs to be done.
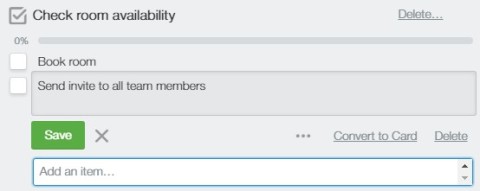
If something on the checklist ends up as quite a big task in its own right you can use CONVERT TO CARD, making it a new, separate task in the project.
Due Date: when does this need to be completed by?
Attachment: add any attachments that might be needed or are relevant to the task in hand.
There is an area for comments. People can add comments, attachments, mention people or add emojis. This gives the task more of a social element where team members can contribute or comment about the task.

If you want to kept up to date with changes etc. in the activity then you can SUBSCRIBE and get notifications.
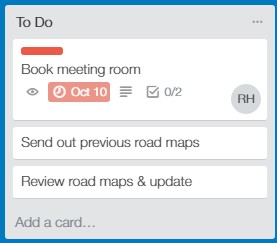
Depending on how many things you want to display on the card you will see a number of icons etc. showing you a simple visual summary of the activity.
Back on the main board, you have a number of icons on the right hand side:
- People
- Activity
- Power-Ups
- Filter
- Stickers
- Settings
People: displays project team members
Activity: shows any activities that have taken place or comments added.
Power-Ups: You can add extra functionality to Trello. If you have the free version, you can only enable one power-up per board. To add more than one then you need to upgrade your account to TRELLO BUSINESS CLASS. There is a long list of power-ups available. Here is just a short sample…

Filter: Use the filter to quickly find things within your project – keywords, tag colour, people or due dates.
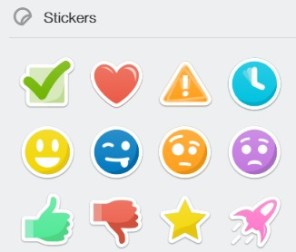
Stickers: Click and drag stickers onto your cards.
Settings: A number of options such as changing the background appearance of your board, controlling member permissions etc. Again, there are a number of options that are only available to business class members.
So, what do you get if you choose to use Microsoft Planner?
Planner
If you have used Trello, then using Planner is almost the same. It has the distinct advantage of being fully integrated into Office 365 and all its applications making collaborative working simpler and creates a smooth workflow across multiple applications within a business. Unfortunately, I cannot do a direct comparison to the Business Class version of Trello as I don’t have it. For the purpose of this blog I am more interested in the general functionality of both applications.
To access Planner you need to be using the enterprise version of Office 365. Log in through the portal and click on the Planner icon.
When you open Planner it will take you to the PLANNER HUB or landing view for the application.
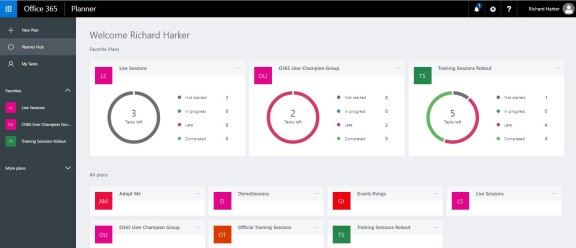
Here you will see any plans that you have either created yourself or are part of. If you are involved in a plan click on the plan name to see the details. If any of your plans are ones that you go to regularly etc. you can make them a favourite by clicking on the three dots next to the name and selecting ADD TO FAVOURITES. This will add a shortcut in the left hand panel as well as display a mini dashboard. Although limited in functionality and detail, it is a useful feature which is not present as a standard feature in Trello (free version).
To remove a plan from your favourites click on the three dots in the mini dashboard and select REMOVE FROM FAVOURITES.
You can create a new PLAN by clicking on NEW PLAN. Complete the details on the new window to name the plan, add an optional description and decide whether you want members to receive mail notifications generated by assigning tasks etc.
Whereas in Trello you create a new board, in Planner you create a plan.
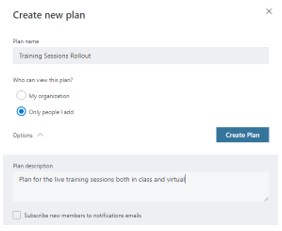
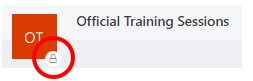
Give your plan a name, and decide whether the plan is open to all to view or limited to team members only. When you look at plans on the PLANNER HUB, any plan icons with a padlock are limited to members only.
Once complete click on CREATE PLAN.
When a new plan is created, a group is set up with its own calendar, mailbox, SharePoint area etc.
When you start a new plan the initial layout and way to get started are the same as Trello. Planner uses BUCKETS. By default, you start with a TO DO bucket where you can add tasks. Think of the buckets as top level summary tasks. You then add detail to each bucket by adding tasks. To add new buckets click on ADD NEW BUCKET.
When you create a new plan the default bucket that is created is TO DO. You can rename this by clicking on TO DO and overwriting it to whatever your task summary name you want to give it. To add a task, click on the plus symbol.
You will ned to build a team so tasks can be assigned to the various team members. Click on the MEMBERS arrow and type in the name of someone you want to invite to the plan. As you are linked to the enterprise, the names of every employee should be listed, so just start typing a name and when the name appears click on it to add it to the list.
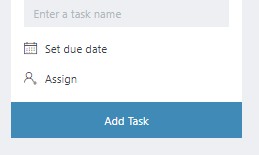
Now, when you create a task you can name it, select a name or several names to assign the task to, and set a due date. Then click on ADD TASK. This is the bare minimum required. Just like Trello, click on the task card to reveal a details window.
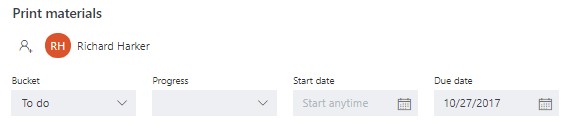
You can set the PROGRESS status for the task (Not started, In progress, Completed). Set a START DATE if necessary.
You can add a more detailed description if that is of help.

Add a checklist if you want to break down the task a bit.
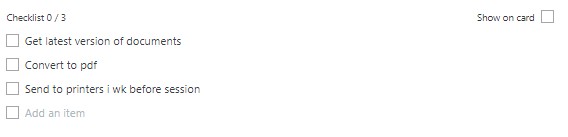
Tick the SHOW ON CARD option if you want people to see that there is a checklist.
If an item on the checklist is later considered too big a task to be a checklist item you can convert it into a separate card. Click on the item to select it then click on the PROMOTE ITEM arrow over on the right hand side.

This will convert the checklist item into a new task that can be edited and assigned like any other task.
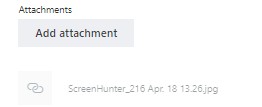
Add any useful or relevant attachments. If you tick the SHOW ON CARD option you will get a preview of the file appearing on the card.
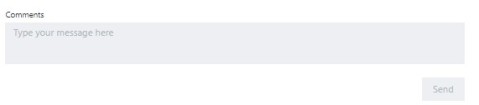
Comments can be added to the task. These will form a conversation within the task.
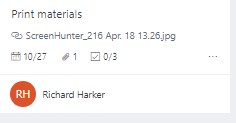
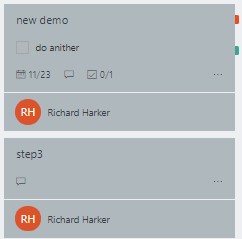
Depending on the number of options you selected to be displayed on the card you will see something like this for each task. Note that you can only display one of the SHOW ON CARD options at a time at present.
You can switch views from the BOARD with all your buckets and tasks, to the CHARTS view, which is the mini dashboard giving you a quick overview of the plan.
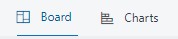
Click on CHARTS to get this;
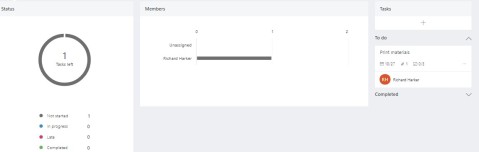
Obviously, the more tasks and assignments you create the more information will be displayed here, but it’s a nice feature to get a quick summary of the plan in a visual format.
Use the drop down GROUP BY option to change how you see your plan’s status.
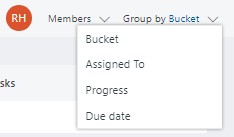
This is a useful feature so you can quickly review your plan’s tasks in a variety of ways. To quickly highlight any tasks assigned to a specific person, go to the MEMBERS area.
Click on the image or the initials of the person whose tasks you want to see and in the window below, any tasks assigned to that person will turn grey.
This will work in any layout view.
So, whether you choose to use Trello, Planner or Asana, it’s down to the individual people who were assigned tasks to do them and update them so everyone involved in the project is aware of what is going on and up to whoever the project manager or equivalent is to oversee everything. At the end of the day, no software, however good, manages a project…people manage projects. The tools are there to hopefully make managing them a bit easier.
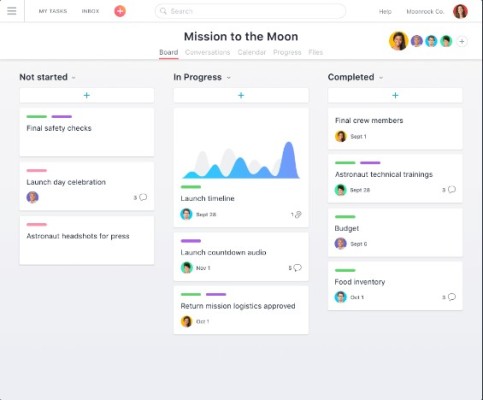
If you want to look at Asana for comparison go to Asana.com. This comes in three versions: free, Premium and Enterprise. Below is a screenshot taken from their website. A you can see it has a similar feel and layout to Trello and Planner. As with Trello, some of the neater features such as creating dependencies are only available in the paying versions.
Planner is probably the one with the fewest features at the moment, but is relatively new and there are regular updates so no doubt over time, Planner will add a whole raft of features to bring it more in line with the likes of Trello and Asana. The main advantage that Planner has over the other two is that is fully integrated in the Office 365 suite of applications so working from one application to another is pretty much seamless…you just have to be on an enterprise version of Office 365, whereas the other two are standalone packages.
The choice is yours.
MS Project – Working with Multiple Projects
Working with one project can be difficult enough, but you may well find yourself managing or having to keep an eye on multiple projects which of course makes it several more times difficult to manage and control.
Unlike Primavera, which is set up so you can manage a wide portfolio of projects from the same screen, Microsoft is essentially a one project view (I can already hear gasps of shock from the more advanced users at that last comment) but MS Project does have the ability to display multiple projects in a single project view.
For this, I am just going to use 2 projects to keep it simple but this could just as easily apply to 10 projects or more. I am also not using SHARED RESOURCES to keep it simple, but you do have the option to use shared resources from a common pool to use across multiple projects.

Rather than have to go into each project individually I want to see them both at the same time and on the same screen. For that have a blank project open and go to the PROJECT tab and click on SUBPROJECT. If you are using 2003 or 2007 go to the INSERT menu, and select PROJECT.

Select all the projects you want to view together, using SHIFT + left click to select a whole group of projects or use CTRL + left click to select non-contiguous projects, then click on INSERT.

Note the LINK TO PROJECT tick box. By leaving this option ticked, the imported projects remain linked to the original ‘stand-alone’ projects. This means that any changes you make in the new multi-project view will feed back to the original project so you don’t have to duplicate any work you do updating both the multi-project and the single projects. If you untick this option, then any changes you make to the multi-view project will not affect the original projects.
You should now see this:

Notice that there is a PROJECT icon in the left hand margin to show that these are imported projects rather than project tasks.

By clicking on the expansion button you can see the entire Gantt chart for each of your projects. If you are used to reviewing your project through the STATISTICS button on the PROJECT INFORMATION window, then you will encounter a slight problem. If you check your STATISITCS now you will get total duration, work, cost etc. for ALL the projects in the current view. In order to view the STATISITCS for each project individually, you have to treat each project as a TASK.
Click on one of the project names, go to the TASK tab, and click on INFORMATION in the PROPERTIES group. You will see the multi-tab task information window as though looking at a standard task, but you will now notice that there is a PROJECT INFORMATION button. Go to the ADVANCED tab and there you can see whether the project is linked, read only etc. and you can use this window to change the options whenever you want.

To view the project STATISITICS of the selected project, click on PROJECT INFORMATION, then in the next window click on the STATISITCS button.
So now you can view and edit (if you want to) all the projects you are keeping an eye on in one simple view!
Note that if you do edit the consolidated multi-project view you will be prompted about saving changes to the original project.

Decide for yourself what changes you want to save back to the original project and click on the appropriate button. If changes are made to the original stand-alone project then these changes come through automatically to the multi-project view.
Good luck managing your many projects!
